Installing Stair Nose
STEP - 9 Installing Stair Nose
Click on the photos to enlarge
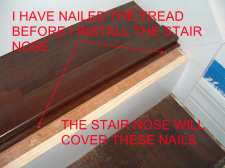
When installing stair nose I use construction adhesive and nails. After you have your stair nose cut to the correct size we can install it. When installing stair nose, the tread and riser need to be installed first. As you can see in this photo to the left I nailed the tread on the edge. The stair nose will overlap here and hide these nails.
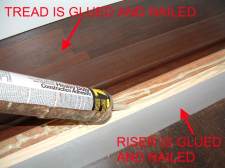
I like to be generous when applying construction adhesive for the stair nose. Don't apply it too close to the outer edge of the riser, the glue will squeeze out and it is a little messy trying to clean it. If you have to clean it use mineral spirits.
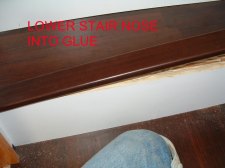
After applying the glue push the stair nose down into the glue. Make sure the over hang part of the stair nose is pushed back against the riser.
From the Manufacturer. The Stair Wizard is the finest stair tread and riser gauge available anywhere that will allow you to install wall-to-wall type treads in half time of traditional methods. The Stair Wizard works by creating an exact template of each tread (or riser), including length, end angles and depth Simply scribe the tread bank along the template outline, or use the Stair Wizard itself as a cutting guide. It automatically allows for and desired tread overhang, and will accommodate stairs up to 14-inches deep and 53-inches wide. Extensions are available. Complete with case.
Nailing Stair Nose
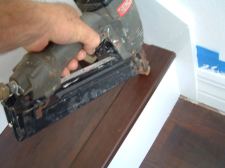
Now that the stair nose is seated in the glue I nail it with my nail gun. I use a 2 inch nail that is 15 gauge. Don't nail too close to the front of the stair, as you take the chance of the nail coming through the riser. Nail back from the front where you know the nail is going to hit solid wood. I usually use 3 to 4 nails, one on each end about 3 inches from the wall and either 1 or 2 in between these two. If you don't have a nail gun you can nail it with a hammer and use a nail set to counter sink the nail. I would take it nice and slow with a hammer.
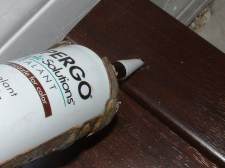
Nailing the stair nose will leave little holes. I either use a matching putty or laminate sealant. Sometimes it can be hard to find the right color to match the stair nose. I have mixed different colors together to get a close match.
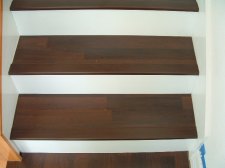
After the stair nose is installed, this should complete everything for your finished stairs. Here is a photo of the finished stairs after installing the stair nosing.
Return to DIY on Stairs From Installing Stair Nose
| SEARCH THIS SITE
|
