Installing Last Row of Laminate Flooring in Hallways
Installing last row of laminate flooring in hallways can be challenging at times. Installing the first side is easier, but the opposite side requires that the boards be cut and slide under door jambs in most cases.
Here I will describe how to cut and install the last row of laminate flooring in the hallway.
There are basically two types of laminate flooring. One type will allow the laminate planks to be tapped together laying flat side by side next to each other. The other type requires that one plank needs to be tilted up at an angle in order to engage and lock into the adjoining plank.
The difference between these types of laminates can make the job of installing laminate in a hallway easier or harder. Its impossible to slide a laminate plank under a door jamb and tilt it up at the same time, that's the hard way.
The easier way is to have laminate flooring that slides together laying flat, such as a Unclic product or a Pergo locking system.
A few of the Uniclic laminate floors are Mohawk, Quick Step and Columbia. There are others out there if you look.
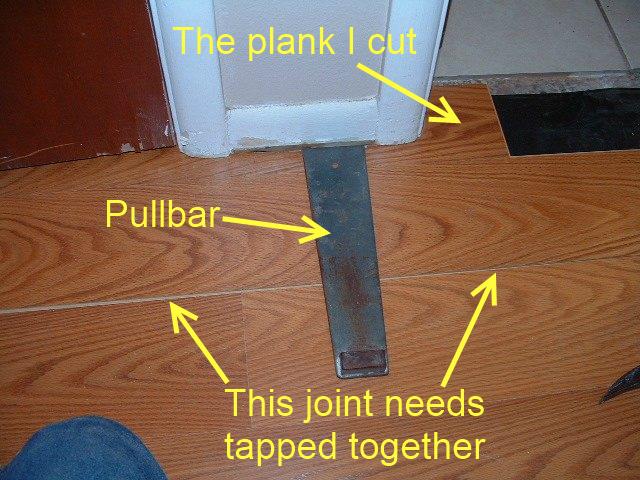
To install the last row of laminate under a door jamb, you have to first cut the plank to fit the space. Next you slide the plank under the door jamb and tap it back toward you with a pull bar so it engages in the adjoining plank.
When your using a laminate that will not tap together laying flat you have to shave some of the locking system off, when you do this there is nothing to hold the planks together. You have to apply a wood glue to hold the planks together. Unfortunately most folks don't learn this until they have already started the installation.
CLICK ON PHOTOS TO GET A CLOSER LOOK
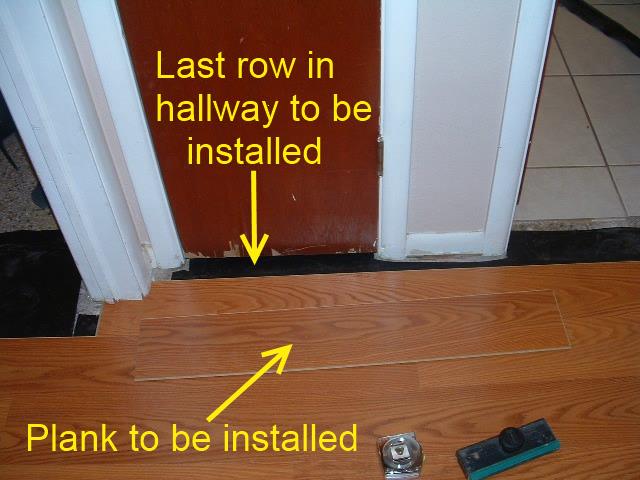
Here is where the last row of laminate needs to be installed in this hallway. The door jambs are already under cut. In this case I am installing Quick Step Eligna which has the Uniclic locking system. This allows the planks to be tapped together while laying flat on the floor.
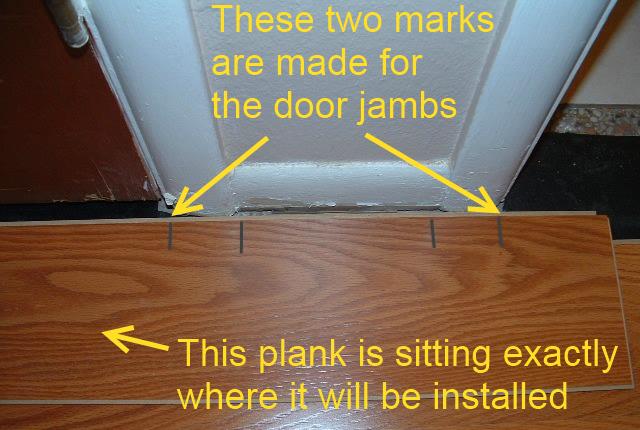
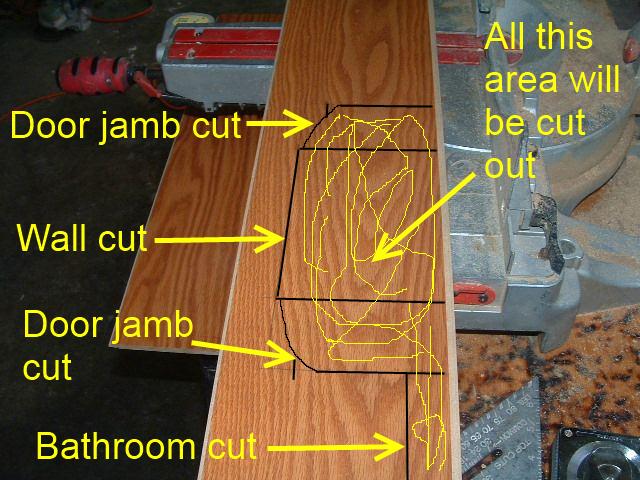
The first step is to position the plank exactly where it is going to be installed, lengthwise. Next make the marks at the door jambs. The two outside marks should be made about 1/2 inch under the door jamb. The two inner marks show where the door jamb ends. You will use these marks for reference for making the cuts.
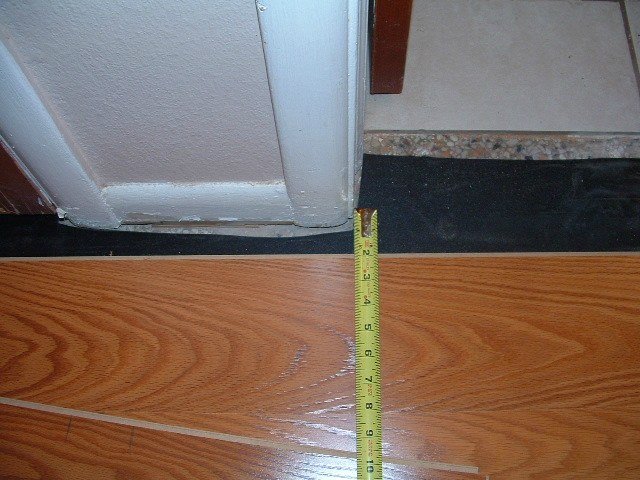
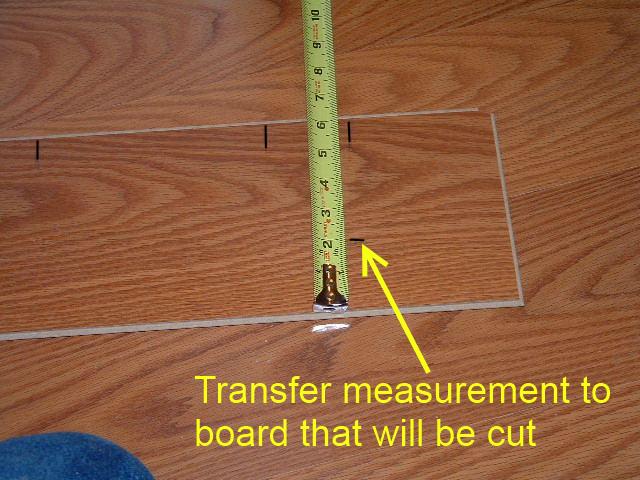
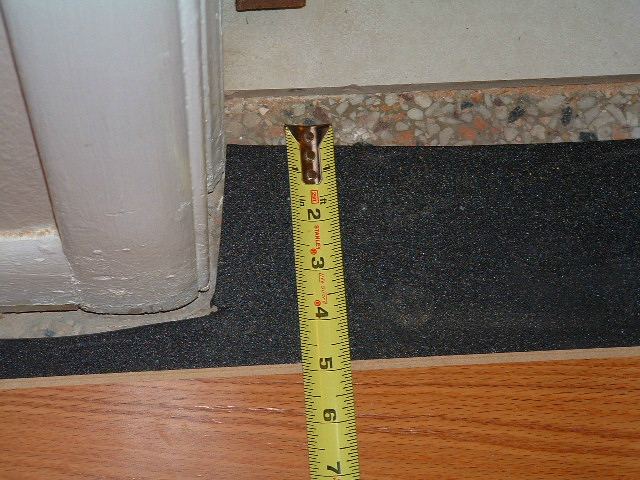
After making the marks that show where the door jamb is located, take measurements from the edge of the installed floor. Measure about 1/2 inch under the outside of each door jamb. Doing this assures that the laminate will slide under the door jamb. In this case you can see that it is 2 inches. Also measure from the wall in between the door jambs. Next transfer the measurement to the board inline with the mark for the outside of the door jamb.
Later you will connect all these measurements which will show where the cuts will be.
This board is also ending at the bathroom doorway up to ceramic tile. A measurement has to be made here also. A T-mold will be installed here. Use a small piece of T-mold to determine where to take your measurement from. I have to mention this because not all T-molds are the same size. Its important to know the width of the T-mold your going to install.
When you have all the measurements on the board you can connect them together. Use a square to draw out the straight lines and free hand around the door jambs.
These may not be the final cutting on the board. Usually it will be a little big and you will have to make more cuts to get it exactly right.
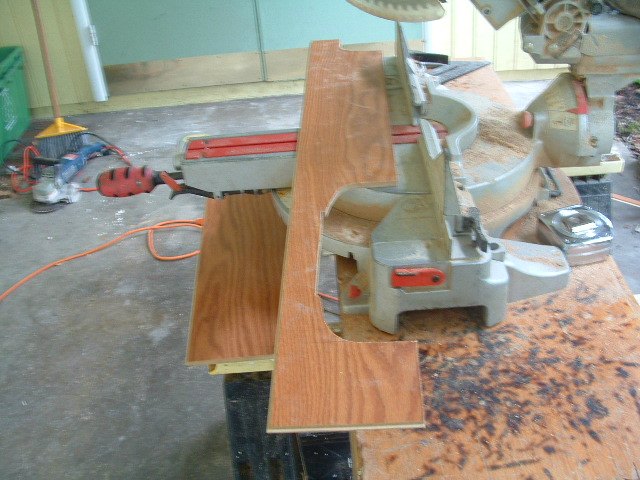
This is after I made the first cut. I use a jig saw do this kind of cutting. Having a jig saw with variable speed is helpful. The variable speed jig saw allows you to cut at low speed or high speed.
This is not always the final cut when cutting around door jambs. It may need a little more cutting to get it right.
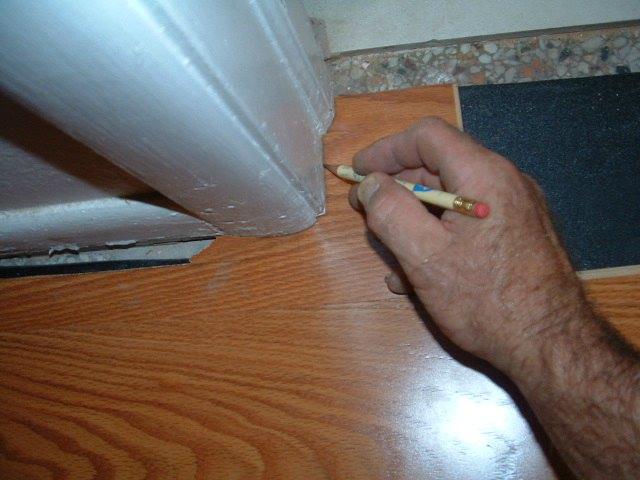
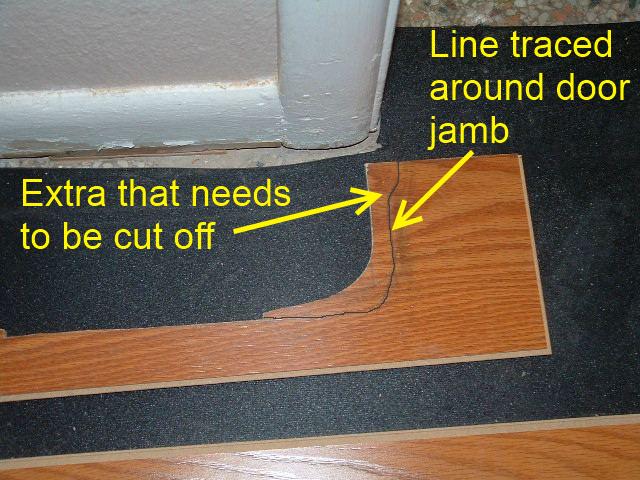
After I made the initial cut on the board I temporarily installed it where it will be. Then I trace around the door jamb with a pencil. Next I remove the board. Removing the board in this case is easy since it has the Uniclic locking system. Other brands may not be so easy to remove. If this is the case, don't install the board, just lay it in place and get the edges as close as possible without locking the boards together. Note: I left the board out to the right to make it easier to install this board and take it back out.
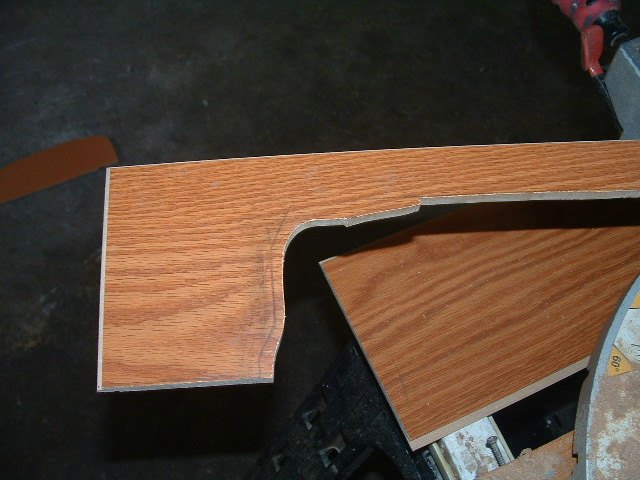
After I trace around the door jamb, I can cut the excess off the board. Having too much under the door jamb can cause the floor to buckle if it expands. What you want is for the board to go under the door jamb, but not too much. There are structural boards under the door jamb that don't get cut when the door jam is cut.
This is after I cut the excess off. Notice how I leave about 1/4 inch on the board. This is the amount that will be under the door jamb.
There may be times when you can't just slide the last plank under the door jamb unless you remove the plank that was last installed. In this case I removed the last plank to make it easier to install the last one.
After removing the plank I connected it to the one I just cut. Now I can install the two planks as one. I use the pull bar and tap it all together.
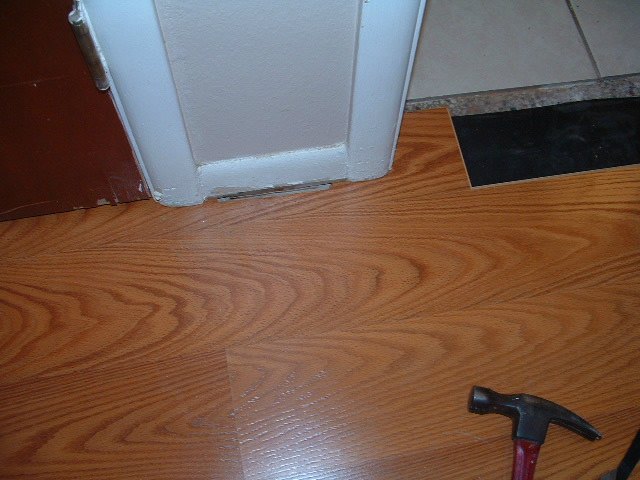
Here is the finished plank installed under the door jambs. It can be time consuming but if you take the time it will look as if the door jambs were installed on top of the laminate flooring.
Installing the Tilt up Laminate Under Door Jambs
How to Install the Last Row of Laminate in Hallway
SEARCH THIS SITE
