Installing Last Row Laminate Flooring
When installing the last row of laminate flooring, often times the space will not be the same. Mainly because of the walls not being exactly parallel to the wall you started at. The wall may also not be straight, it can bow in or out. What you need to do is to measure each plank at both ends then make a line to cut on.
The idea here is to maintain the expansion gap along the wall so it is not too big or too small. If the gap is too big the base board or quarter round may not cover it. If it is too small the laminate may expand and end up against the wall.
Here I will describe the method I use when I get to the last row when installing laminate.
(CLICK ON PHOTOS TO ENLARGE)
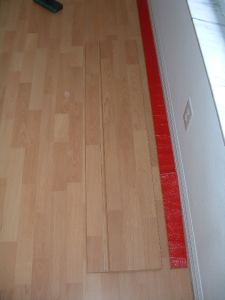
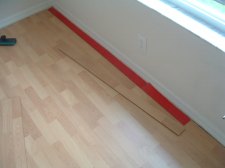
Here is where I am working up to the last row in the bedroom after starting on the other side of the living room.
Measure to Cut Laminate Plank
You will need to measure the width for the last row to be installed. Here I measure one end and transfer this to the laminate plank that needs to be cut. I make a mark with my pencil.
Here I am measuring the opposite end of the plank where the last row will be installed. I often will check in the middle with the tape measure as the wall can bow in or out at times. If this is the case transfer the middle measurement to the middle of the plank, then draw the line to cut from the first mark you made to the center mark, then from the center to the last mark at the end.
Cut Laminate Plank
I use a full plank as a straight edge to draw the line where I will cut. I cut this with a table saw. You can use other saws to cut here such as a jig saw or even a skil saw.
Here is the laminate after I cut it for installing into the last row. I will connect it in place along the long side of the joint to check for accuracy. If I need to cut some more off I will make marks along the side.
Install Laminate Plank
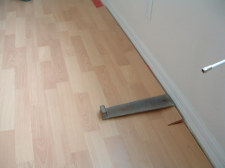
After cutting the laminate to the correct size I will install it with the pull bar along the long side of the plank.
Connect the joint and as you tap on the pull bar push the plank down and keep moving from one end to the other until the plank is laying flat.
NOTE: Not all laminates will allow you to install the plank in this manor. Some locking systems will not allow you to connect the long side first and then tap the end joint together.
If this is the case you may have to connect all the planks together at their ends and install the whole length as one.
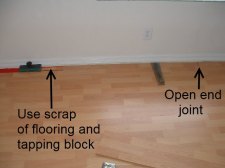
After connecting the side joint, I still need to tap the end joint together. With the space too small to use the tapping block, I like to use a scrap piece of laminate with the correct side to connect to the plank I am installing and tap the scrap piece. This way I won't damage the end of the plank when I tap it together.
Return to Laminate Flooring Installation Page From Installing Last Row Laminate Flooring Page


