Installing Laminate on Angled Stairs
Installing laminate on angled stairs takes more work and involves cutting more angles.
Installing laminate on a straight stair case is easier when only cutting the sides of the treads, risers and stair noses.
When installing laminate on angled stairs you need to know what the angles are so you will be able to cut the stair components so they fit together correctly.
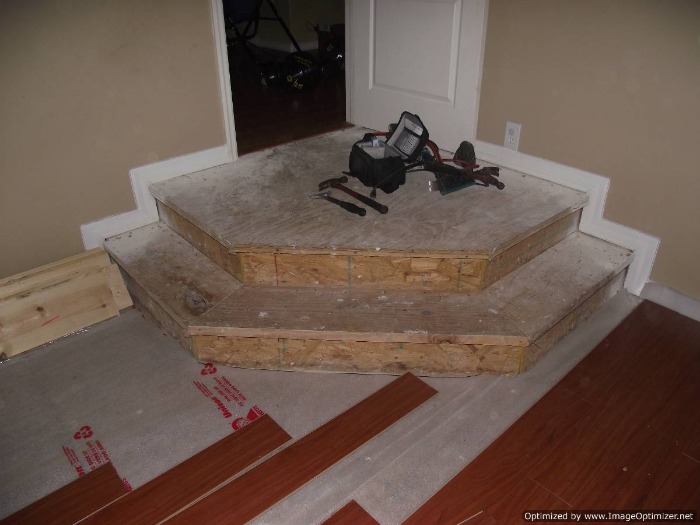
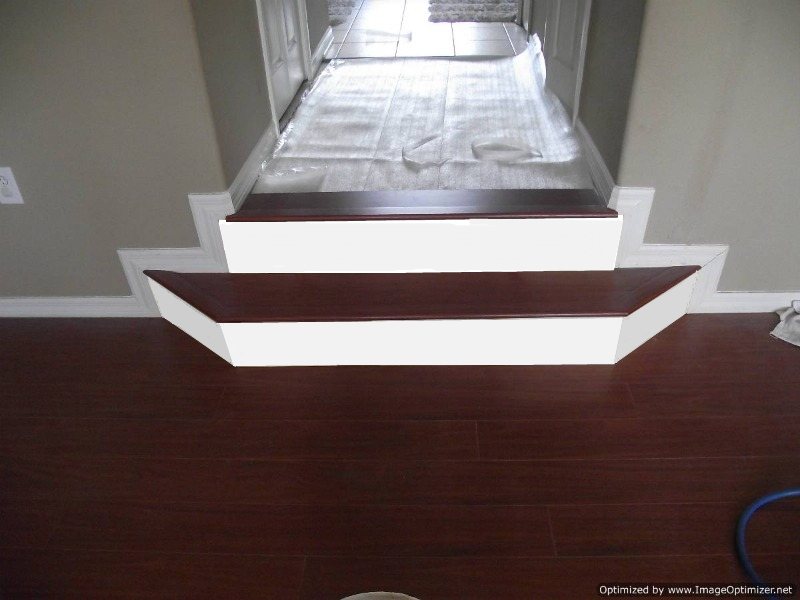
In this case I am showing a two step drop down leading into the master bedroom. These steps were originally covered with carpet. The carpenters were not too concerned about how plumb or level these steps turned out, knowing they would be covered with carpet.
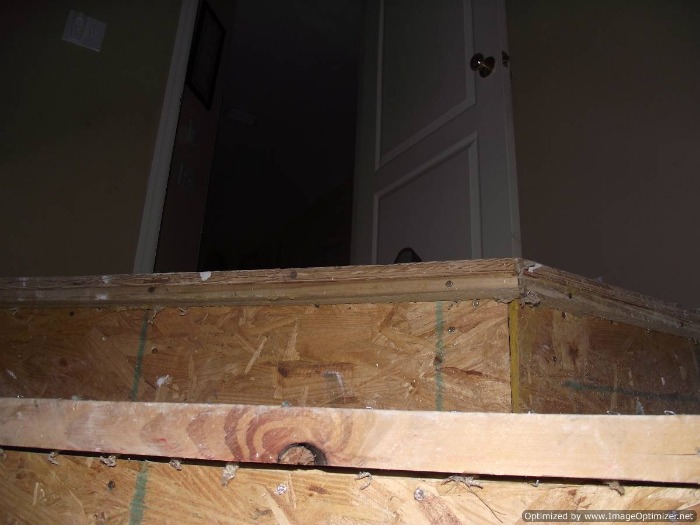
This can present problems that will need to be addressed when installing laminate on angled stairs. The vertical parts of these stairs were not plumb ( straight up and down) so when attaching the risers to these areas the risers want to lean in or out at the top or bottom.
These stairs were built with an over hang. I need to cut these off so the new risers can be cut to fit flush with the top of the treads.
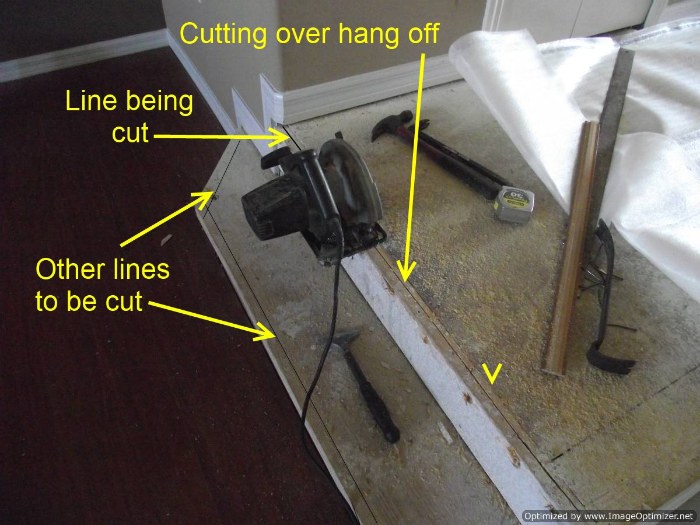
I measure the over hang underneath and transfer this measurement to the tops of the steps. Next I draw a line to show where I need to make my cut.
There are different saws that can be used for this. You need to be familiar with the saw you are working with. Some people use a jig saw or a sawzall or even a circular saw.
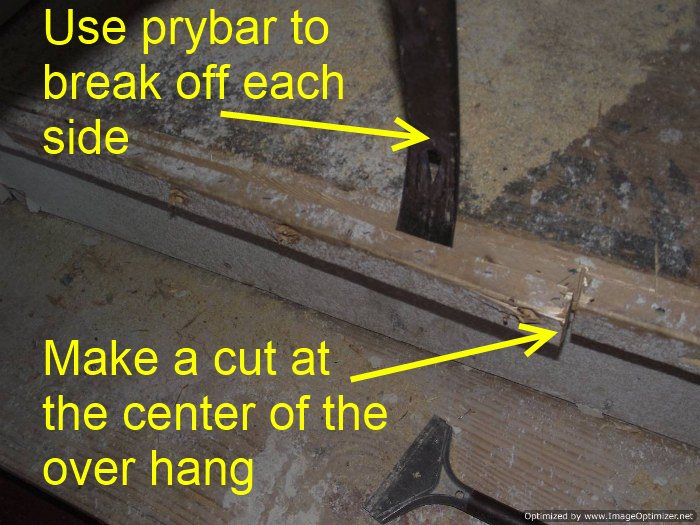
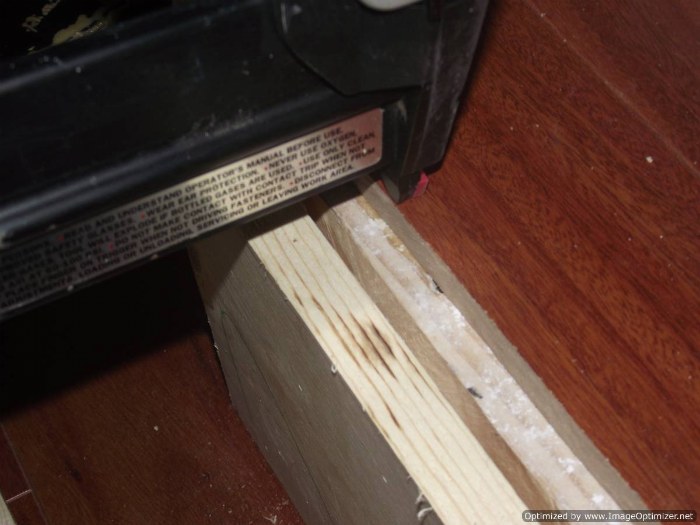
In this photo the over hang is being cut off with a circular saw. The saw will not be able to cut all the way to the end. I cut as far as I can and then make a cut in the center.
After making a cut in the center of the over hang, its easy to break the over hang off with a pry bar. the ends don't always break off even like the cut. You will have to use a chisel and hammer to clean up the ends. They don't have to look pretty since they will be covered up with the riser and stair nosing.
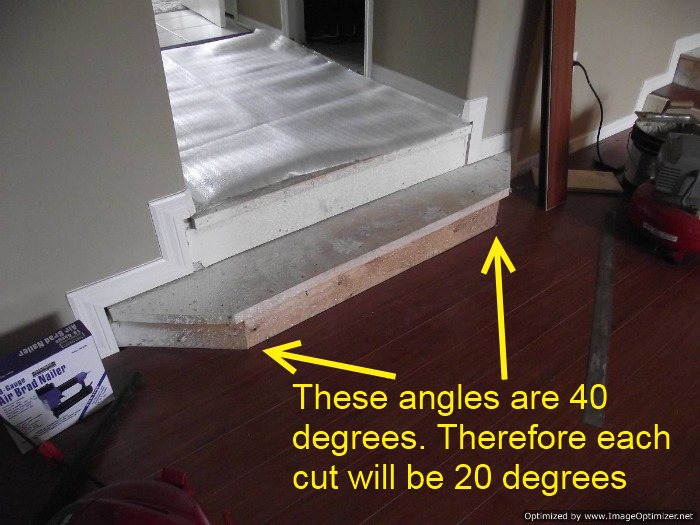
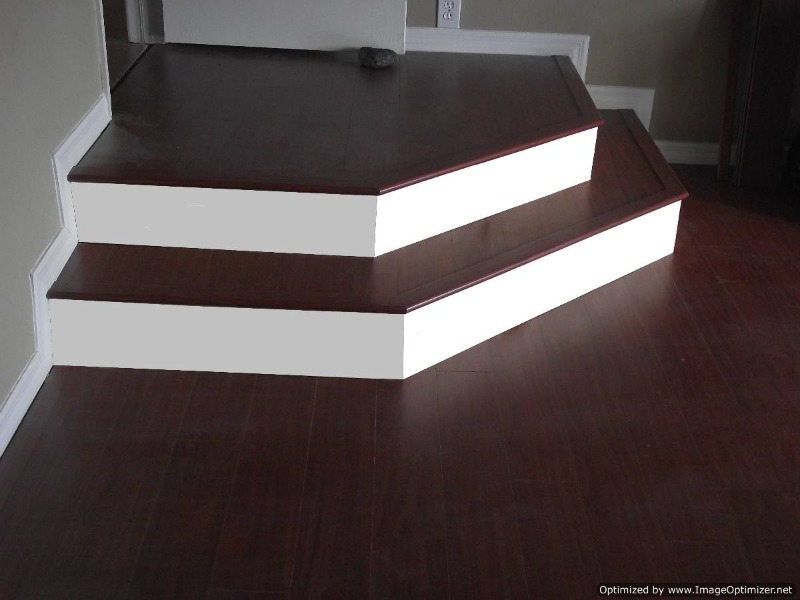
This is another step that is going to have laminate flooring installed on it. When cutting the risers and stair noses knowing the correct angle to cut them is very important.
In this case the angles on this step are 40 degrees each. So when cutting the stair parts such as the risers and stair noses, Each cut (in this case it will be 20 degrees each) needs to equal the total of the angle. This will result in a tight fit when the pieces are installed.
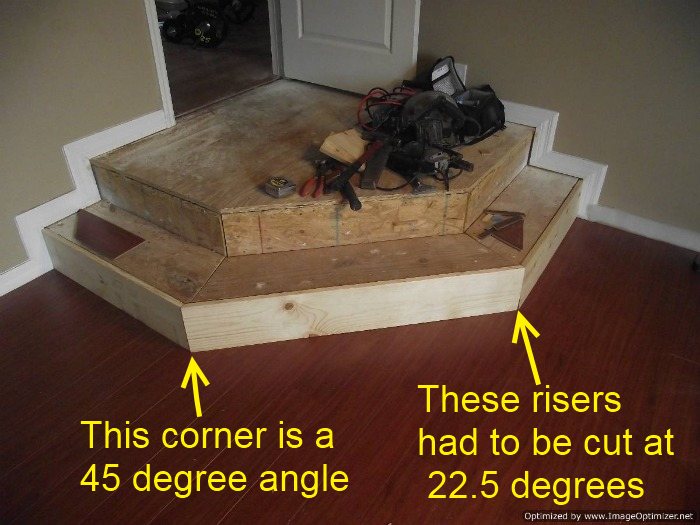
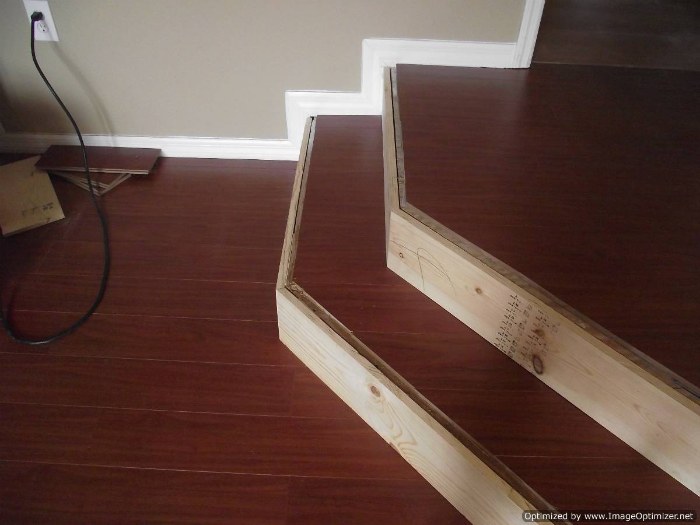
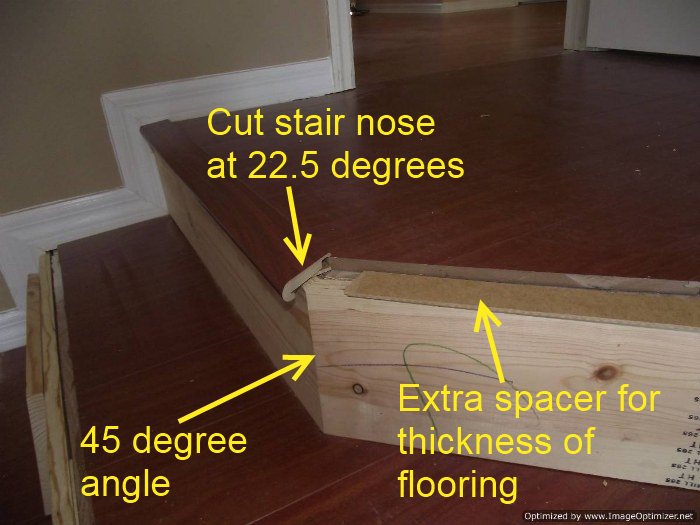
In this photo I have cut the pine risers at 22.5 degrees each. The corners on these angled stairs are 45 degree each. This means that when cutting the risers to fit they need to be 22.5 degrees each which adds up to 45.
These risers are 8 inches in height. So trying to cut them on a simple miter saw may not work, unless the miter saw can cut on a bevel (this means that you can tilt the blade from side to side).
When cutting on a bevel having a sharp blade makes it a whole lot easier.
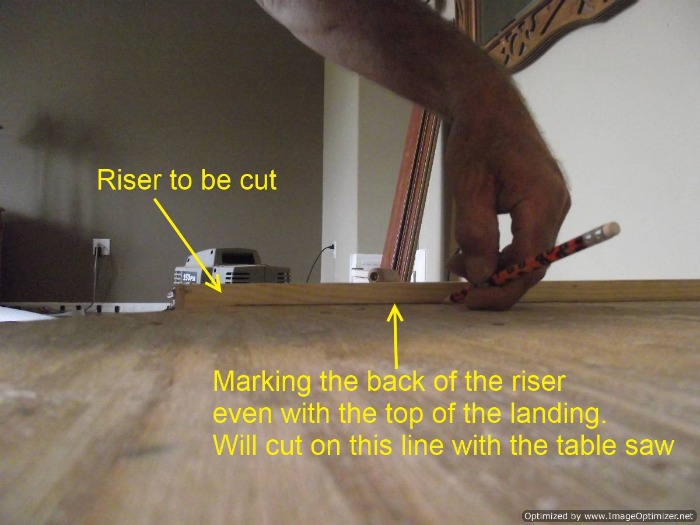
After cutting the risers to the correct angle to fit together at the corners, the tops of the risers will need to be cut flush at the top so the stair nose will sit level.
The best way to do this is to hold the riser in place where it will be installed and mark the back with a pencil. follow along the top of the stair so when you make the cut the riser will be flush. You can make the cut on a table saw following the line.
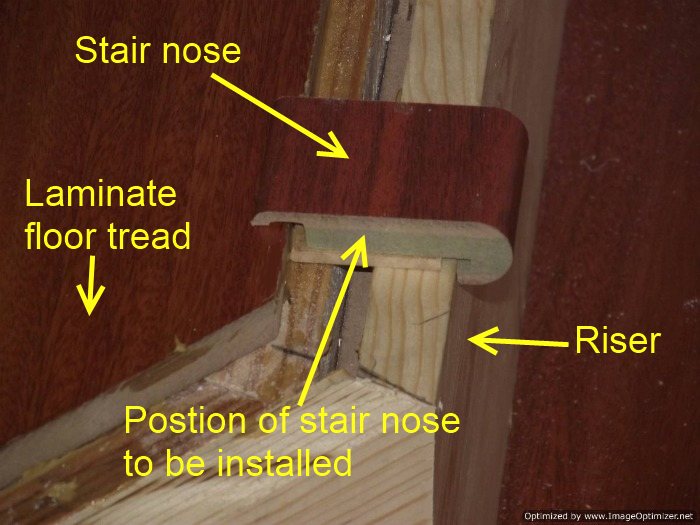
I use a small piece of the stair nose that will be installed on the stair as a guide, to make sure the stair nose sits level on the riser and the stair nose overlaps the laminate stair tread.
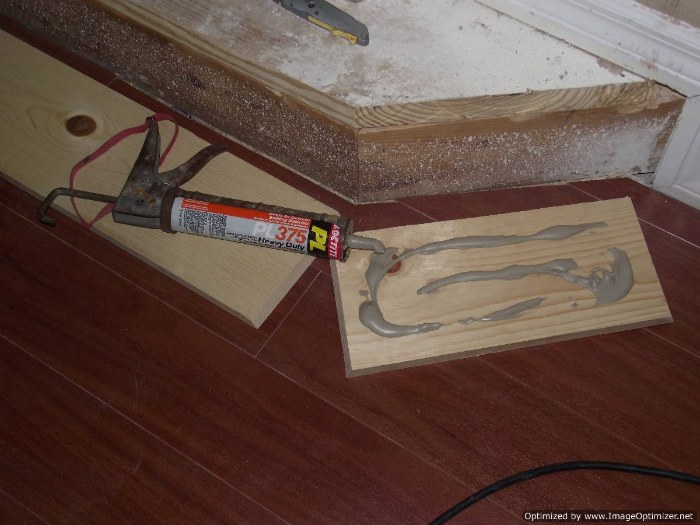
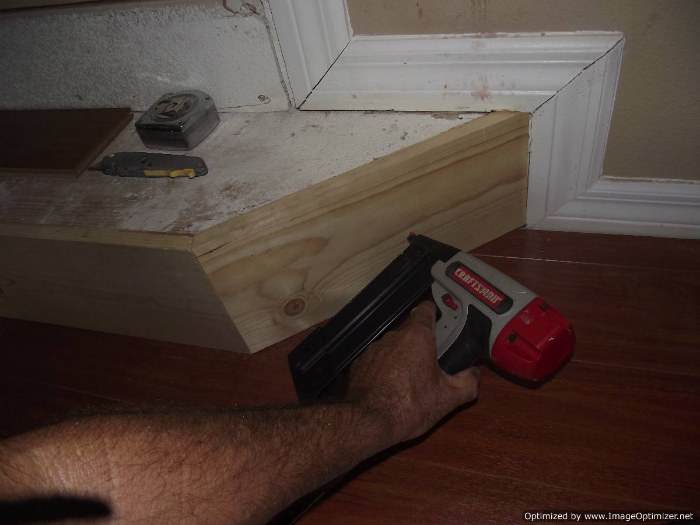
After getting the risers cut to the correct angles, installing them requires applying construction adhesive to the back and then nailing in place. I like to use a nailer so the riser stays put until it is nailed.
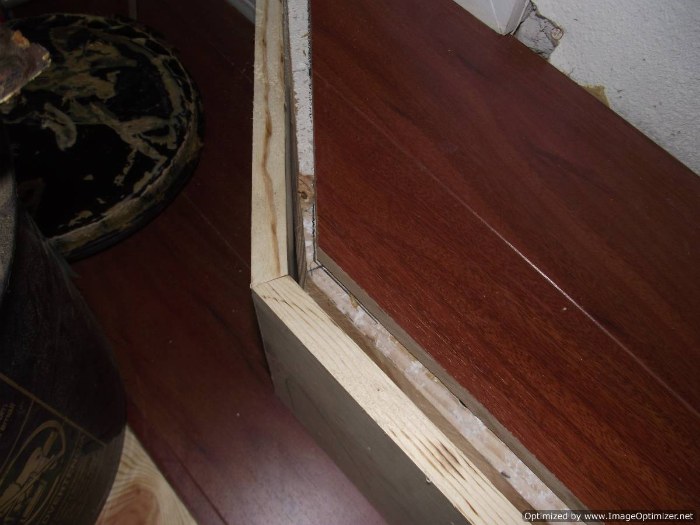
Cut the laminate to fit on the tread so the stair nose covers the riser and over laps the laminate tread. Use a piece of stair nose as a guide and draw lines so you know exactly where you will cut the laminate.
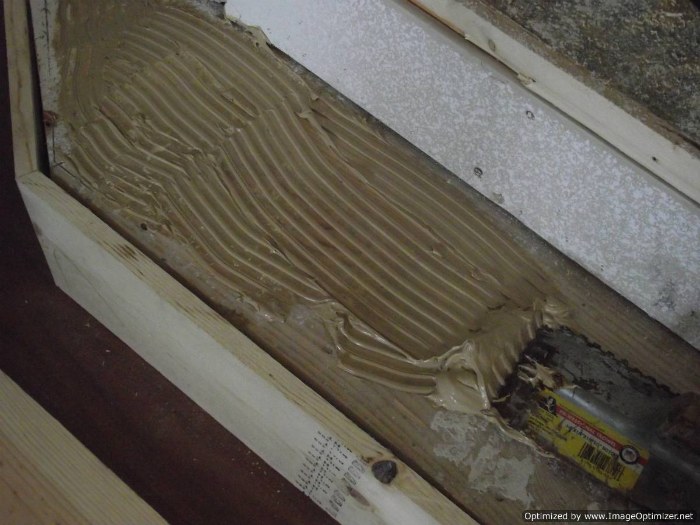
I prefer to glue the treads down with some wood glue. Others recommend using a construction adhesive, but I like the whole surface to be glued as this makes it feel solid.
After the laminate tread is glued, nail as close to the edge as possible. The nails will be covered when nailing along the front edge by the stair nose that will over lap. You can nail along the back edge also as the next riser will sit on the tread and hide those as well.
Installing the stair nose is the last thing to do. I have installed the laminate tread on the small stair. I glued the small stair, but the landing above is too big to glue. I laid the laminate above over the padding and nailed around the edges with a brad nailer. The laminate is a 12.3 mm thick product so I am not worried about it expanding on this small landing.
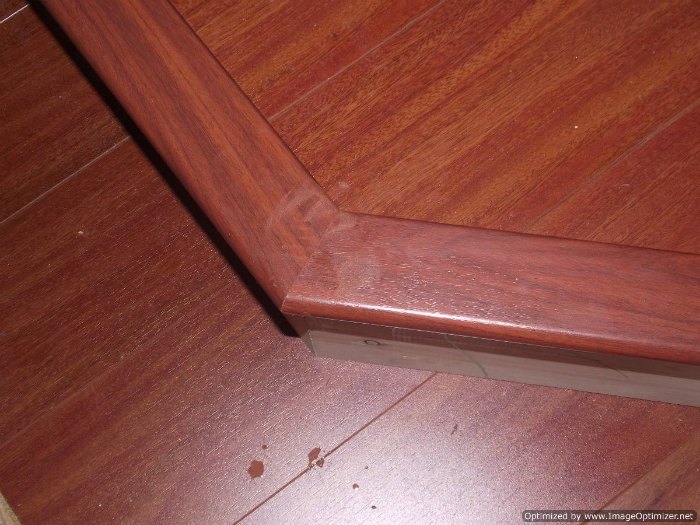
Since the angles on these stairs are 45 degrees, each stair nose will need to be cut at 22.5 degrees. If one is cut at 22 and the other is cut at 23 degrees, they will not be the same size and will not match up evenly. Its important to cut each piece that connects at the same angle. When installing laminate on angled stairs getting all the angles cut right can make all the difference in how the stairs will look over all.
This particular stair nose came with a spacer. the spacer is needed because the laminate flooring is 12.3 mm thick and the stair nose is not made for that thickness.
Use construction adhesive to glue the spacer down first (if it is necessary to use the spacers). And then use the construction adhesive to glue the stair nose on top of the spacer. After gluing I like to use a nailer to nail about every foot or so to ensure that it is attached securely. I like to use 2 inch 18 gauge nails.
The higher the gauge the thinner the nail. Using a thinner nail leaves a smaller nail hole to fill in with a matching putty.
You can use matching putty on the stair nose joints also to fill in small gaps.
Return to Installing Laminate Flooring on Stairs Page From Installing Laminate on Angled Stairs Page
The first thing I had to do is to finish installing the laminate flooring up to these stairs. The laminate flooring is going to be installed on the treads (the part that you walk on) and the risers are going to be 1 X 8 pine wood. The bottom risers will set on the laminate that is installed up to the stairs. The second set of risers will set on the laminate installed on the bottom stair. The pine wood will be painted white. The risers could also be the same laminate flooring, but in this case my client wanted the painted riser.
Cutting Over Hang off the Angled Stairs
Cutting the Correct Angle For Installing Laminate on Angled Stairs
Cutting the Risers to the Correct Height
Installing the Risers
Installing the Laminate on Angled Stairs, Installing Stair Treads
Installing the Stair Nose on the Angled Stairs
Completed After Installing Laminate on Angled Stairs With Painted Risers
SEARCH THIS SITE
