Installing Laminate Down Hallways
Installing laminate down hallways from another room is not always covered in the directions that come with the laminate flooring that you bought. It can be a little tricky and frustrating at times. The main obstacles are doorways (door jambs).
The more difficult hallways to install are when the laminate boards run the length of the hallway (not side to side).
CLICK ON PHOTOS TO ENLARGE
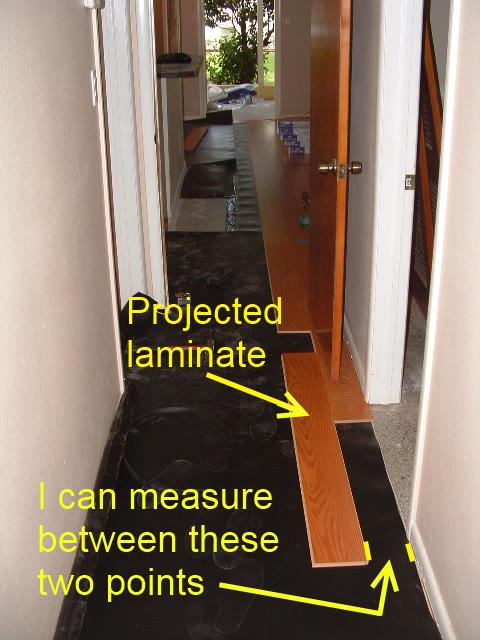
So your installing the laminate in the living room and you come up to the corner of the hallway, what next. What I like to do is to add rows to the living room floor so I can project the laminate down the hallway.
This gives me a point to measure from. I can measure from the temporary projected laminate board to the wall and door jamb. I transfer these measurements to the next board to be installed. this takes a lot of guess work out.
As you progress down the hallway you can repeat this process.
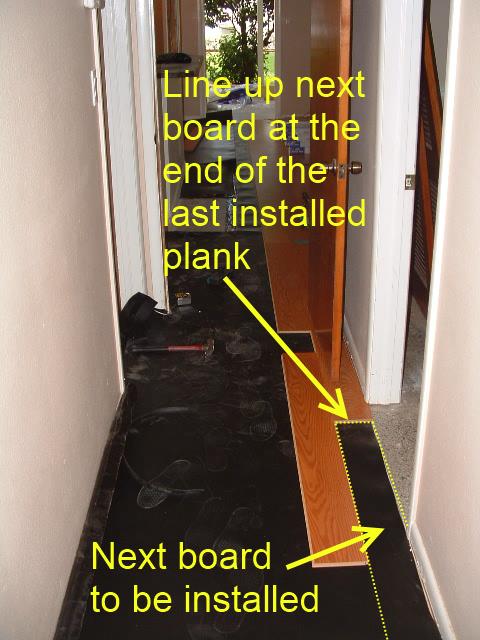
Here I have outlined the area where the next board will be installed. Line up the next plank to be installed with the end of the last one installed.
This will allow you to mark where the door jamb is so when you take the measurements you will know where to cut.
After making the cut, remove the temporary board and install your cut board to the last installed board. Then the temporary board you took up can be installed permanently.
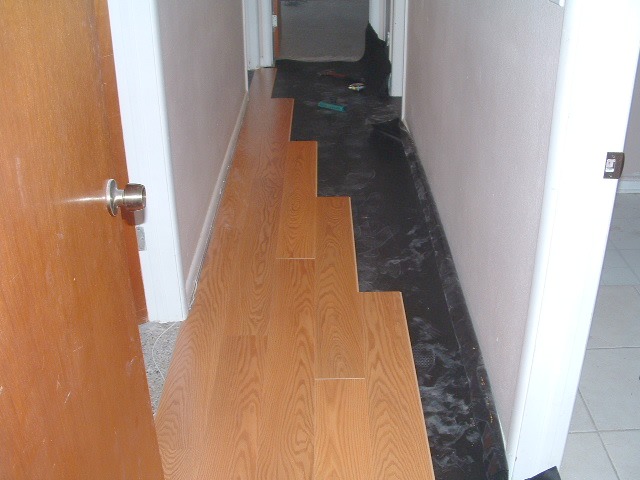
Keep using the temporary boards to get the measurements as you proceed down the one side of the hallway.
Proceed down the hallway until the one side is finished. In this case I am extending the laminate into the bedroom at the end of the hallway.
Installing the laminate flooring on the first side of the hallway is easier than filling in the opposite side. After installing the boards in the middle of the hallway, it gets a little tricky trying to fill in the other side.
Laminate manufacturers require laminate flooring in doorways less than three feet wide to have a T-mold if the laminate is to be install in the adjoining room. This means that the laminate flooring has to stop at each doorway less than three feet wide, and leave a gap between the hallway and the room next to it. The gap should be covered with a T-mold.
The reason for this is expansion of the laminate flooring. The laminate can bind up around door jambs and cause the laminate flooring to buckle. I have seen this before. The laminate can raise up a foot off the floor in some rooms, usually in the middle of the room.
I have seen this more often in the old days when laminate flooring was glued together on all four edges of each plank.
I don't see it as often these days unless someone installs laminate flooring and just does not leave any expansion at all.
I think with the way the laminate connects together today (not glued), it eliminates some of the cases where laminate buckles.
When installing laminate flooring in hallways always remember to leave ample expansion space under the door jambs. When cutting the door jambs always clean as much as possible out from under each door jamb. Using a 1/4 inch chisel works good for this.
On the other hand, I have had a lot of my clients that do not want a T-mold across doorways, they want the floor to flow into the rooms. I have to say that I have done this many times over the years and had no problems. I do let my clients know that it could create problems down the road.
Return to Installing Laminate Flooring in Hallways From Installing Laminate Down Hallways PageShould a T-Mold be Installed at Every Doorway?


