Cutting the Risers
STEP - 4
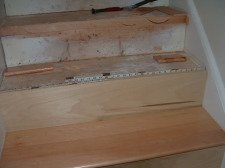
When I start the process of cutting the risers and treads I always use a sample to help me determine the exact cut I will need. I cut samples of the riser as in this photo. I also cut stair nose samples and samples for the tread. This helps when trying to get all the pieces cut to fit as tight as possible.
When cutting the risers and treads I cut all the parts for the stairs and dry fit them before I install them. As I cut the parts for each stair I mark the backs indicating what stair and what position on each stair they will be installed.
Start at the bottom or top?
People have different preferences as to where they start. I always start at the bottom.
When I install laminate or hardwood on the stairs I find that starting at the bottom is easier in order to cut and install the stairs.
The first riser at the base of the stairs needs to on a solid surface. It can rest on tile, wood flooring or concrete. If you have carpet at the base of the stairs you will need to pull it back and remove the tack strip in order to allow the riser to rest on the floor.
I cut the sample square and set it on the floor. Then you can slide it from one side to the other and check to see if it fits flush against the stringer or wall.
If it isn't flush you can adjust your miter saw and make a cut on the sample then check to see if it fits tight.(make a note as to the setting on your saw so you will know the angle you will cut the riser at).
Measuring before cutting the risers and treads
After you determine the angles to cut the riser, measuring the exact width is important here. I use two separate rulers, or you can use two tape measures, as in this photo. It requires a little math here. Pick a point on one of the rulers, lets say 15 inches, now add the length from the other ruler at exactly 15 inches. Say its 20 5/8 inches at this point. Just add the two together and the exact cut will be 35 5/8 inch.
If you measure at the top of the riser, you need to transfer this to the top of the riser you are going to cut. Even if your cutting the riser at an angle. Just start your cut on the mark at the top of the riser on each side.
Getting the riser to fit snug
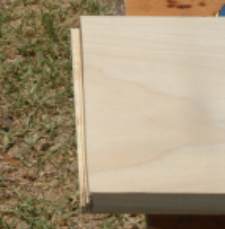
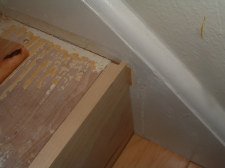
If you are installing a 1 inch thick (actually 3/4 inch) riser, It may not be easy to put it in place because of the thickness. What I do after I cut the riser to the right size, is cut some of the edge off on the back. This allows the riser to be inserted a lot easier. You can either do this on a table saw or on a sliding miter saw. It doesn't have to look pretty. Don't cut too much off I cut about half the thickness off.
With the back of the riser notched out on each side, it will be easier to fit in and have a tight fit. The top of the riser will need to be cut also. I will explain this process when we
cut the stair nose molding.
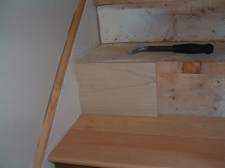
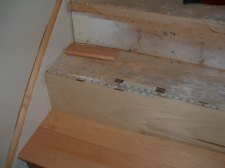
Here in these two photos above you can see the riser dry fitted to check for gaps.
If you do have gaps they can be filled in with chalking or a colored wood putty.
Return to DIY on Stairs From Cutting The Risers Page
Return to Home Page From Cutting The Risers Page
| SEARCH THIS SITE
|
