Cutting Stair Nose Overhang Off
STEP - 2
Cutting stair nose overhang off the stair is one of two choices you have here. Some stairs may not have an overhang if made of plywood. In this case you don't have to worry about doing this.
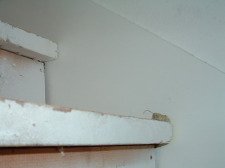
Here in this photo I will cut this over hang off so I can install the laminate on these stairs.
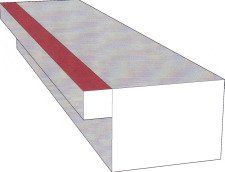
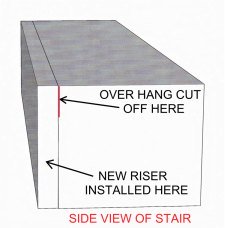
In the photo to the left is a typical outline of a stair. The red portion is the overhang that needs to be cut off. This part of the stair needs to be removed so the new stair nose can be installed here.
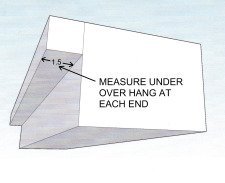
The first thing I do is to measure the width of the over hang on the stair. Measure at both ends, it may vary from side to side. One end may be 1.5 inches, the other may be 1.25 inches. (click on photo to enlarge)
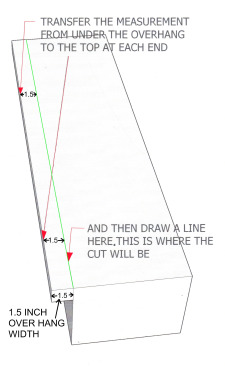
After I measure under the overhang, I transfer this measurement to the top of the stair at each end and either draw a line with a straight edge or use a chalk line to mark it. (click on photo to enlarge)
Which tool should I use when cutting stair nose overhang off ?
Note: There are a few different tools that can be used to cut the overhang off. A circular saw (not the safest), a jig saw (saber saw) with a blade that is a sufficient length. The jig saw is not the easiest to control as far as making a straight and square cut. A sawsall with a short blade can also work but then again you may give up a little control. A router can do the job with the right bit.
Cutting stair nose overhang off
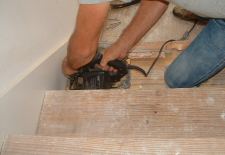
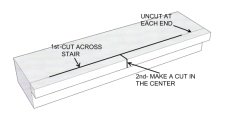
I use a circular saw to cut on the line. I set the depth of the blade to the thickness of the tread I'm cutting. You will have to do a plunge cut to start. (A plunge cut is when you hold the circular saw above the line on the step, start the saw and drop the blade straight down on the line). If your not that experienced with a circular saw use a jig saw. I start at one side of the stair as close to the the wall as possible and cut across the stair until my saw stops at the other side. You need to take your time here and follow your line.
At this point you will have uncut portions at each end.
Next I make a cut in the center. After this cut it is relatively easy to remove each side. I use a pry bar and break each side off by prying in the cut. The ends will just break as you do this.
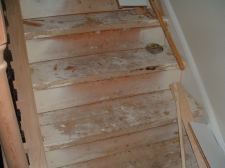
In this photo to the left are some typical stairs before the over hang has been cut off.
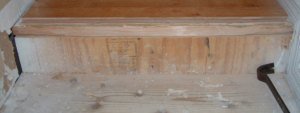
In this photo to the left shows the stair after the over hang has been removed. Click on the photo to enlarge. In the larger photo you can see at either end where I broke the over hang off. After removing the over hang you may need to use a chisel and hammer to remove any excess wood that extends out past the riser. You can notice the extra wood missing at either end. This is OK it will be covered with the new riser.
Here in this photo you can see how the riser needs to fit flush to the stair. Your new riser can be a solid piece of wood that can be painted or you can use flooring. Poplar is a good choice for the riser if you want it painted. It's better then pine as far as smoothness and accepting paint.
Fill the space under the over hang
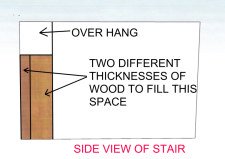
The other option you have here is to fill in the space under the over hang. You may need various thicknesses of wood to accomplish this, depending on how far the over hang protrudes. Some may only protrude 1/2 inch out while others may be 1 1/2 inch. Measure the over hang and figure what thickness of wood you will need to fill it in. You can use scrap wood or whatever you have on hand, it doesn't have to look pretty or be exact here.
Just be sure the wood is flush with the outer edge of the over hang. You can use nails, screws or glue , I like to use glue and nails to make sure it's solid.
Now that the job of cutting stair nose overhang off is complete, we can move on to the next step.
Return to Step - 1
Return to DIY Stair Page From Cutting Stair Nose Overhang Page
Return to Home Page From Cutting Stair Nose Overhang Page
