Cutting Quarter Round Returns
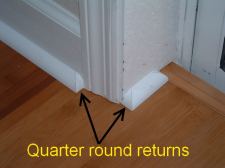
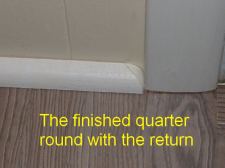
When cutting quarterly returns the result is more pleasing to look at, as seen in this photo. This is a good way to finish off the quarter round when it ends at a by jamb or at the end of a wall.
Click on photos to enlarge
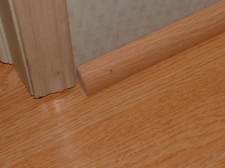
I snapped this photo on a job where I was installing laminate in another part of the home. Here you can install the quarter round straight off where it meets the jamb. Not too pretty.
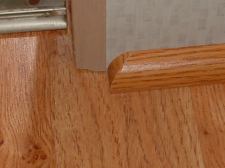
This looks much better. I hope you agree. There are folks out there who have never heard of a quarterly return return. I will explain here how you can do this.
Tools Needed
You will need this saw for cutting the returns, it's quicker and easier. Or you can use a tool called a miter box which has a little hand saw to make the cuts.
I use adhesive caulk for gluing the return in place. If your installing wood grain 1/4 round you can use wood putty or colored sealant.
Cutting The Return
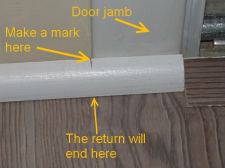
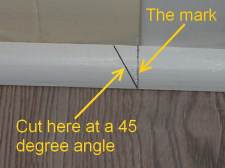
In this first photo I want to end the quarter round at this by jamb with the return. I make a mark at the jamb. The portion to the right will be cut off.
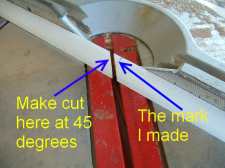
Here I am showing where the cut will be made at a 45 degree angle to the mark I made. You may have to make the cut a little big and trim small amounts off to get it just right.
Precautions should always be used when cutting small pieces on the miter saw. Use goggles
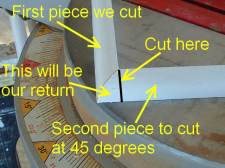
In the cut the 45 degree cut for the return. the piece on the left will be the one we will use. Next we have to cut the return that fits in this little space. Where the bottom ends should end up where we are made.
You may need to study this photo a little to see what I am explaining here.
The black mark in this photo is where the cut will be made. The small triangular shape to the left is our return. When cutting this on the miter saw as careful as the small piece may fly off.
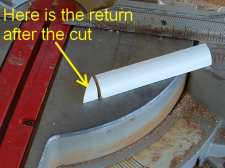
This is after the cut is made the small piece is the return we will use. The cut on the saw was a 90 degree straight cut right on the market we made.
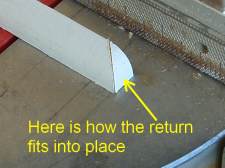
Here you can see how the return fits together with the quarter round that will be installed. The return needs to be glued on with a good adhesive caulk or some wood glue. After the piece has been installed use some caulk to fill in any gaps that may show.
The is the finished product. The quarter round is installed with the return.
Cutting Quarter Round Molding
How to cut quarter round at a 45 degree angle for inside and outside corners
Installing Quarter Round on Round Corners
Some homes have outside corners that are rounded, while others are square. Here I describe how to cut quarter round on rounded outside corners
Return to Installation Quarter Round Moldings
Return to Home Page From Cutting Quarter Round Returns
| SEARCH THIS SITE |
