Cutting Quarter Round Moldings, Inside and Outside 45 Degree Cuts
Quarter Round Cutting Inside Corners
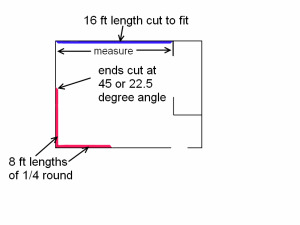
When cutting quarter round moldings most often the quarter round comes in 8 foot lengths. You can purchase 16 foot lengths if you don't want as many joints. When installing 8 foot lengths it can be a little easier as you don't have to measure as much. In this diagram the red colored pieces are 8 footers. The angles to be cut here are for the corner, these are called inside corners. The corners are 90 degree angles therefore when cutting the quarter round, cut the quarter round corners at 45 degrees each. When cutting the angles, each connecting cut needs to equal half of the total angle.
The blue colored piece is a 16 footer. In order to install the long lengths you need to measure the exact length to be cut. This can take a little more time. Sometimes when cutting it may end up too short or too long, which means back to the saw to get it just right.
| SEARCH THIS SITE |
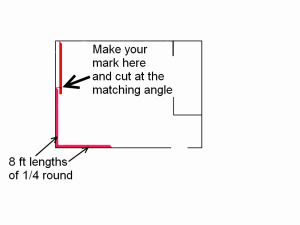
With the 8 footers you can install the first piece then take the next piece and lay it against the opposite wall and make a mark where you will cut, no measuring.
After you get this one cut continue around the room in either direction. You will most likely encounter outside corners as well, this is where the corner protrudes out in a room.
Quarter Round Cutting Outside Corners
Cutting outside corners is the same as cutting inside corners, just in reverse.
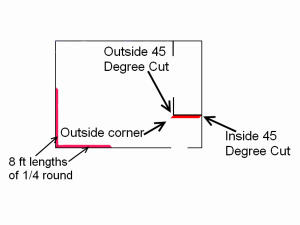
In this diagram you can see how you should first cut the angle on the inside corner. Next lay the piece with the cut against the wall in the corner and make a mark exactly where the outside corner is. As you can see in the diagram the cut is 45 degrees as in the corner.
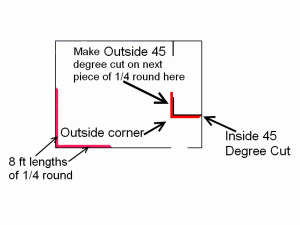
After the first piece of quarter round is cut for the outside corner we then cut the next piece. This time make the 45 degree cut in the opposite direction as the first one. Notice how I leave this piece long to extend past where the wall ends. I do this so I can make sure the outside corner joint fits tight together. Sometimes the outside corner may not be a perfect 90 degrees so you may need to make slight adjustments. When the quarter round ends at a door jamb or where the wall just ends, rather than just cutting the end of the 1/4 round at a slight angle or even worse to cut it straight off with the end of the quarter exposed I always cut a return which will not leave any cut end exposed.
TIP: When cutting quarter round moldings, one way to know ahead of time if the the corners are going to look good is to cut small pieces of 1/4 round about 8 inches long with the outside corners. You can use these as samples to see how they look before you cut any 1/4 round your going to nail up.
Cutting Quarter Round Returns
Next I will explain how to cut and install quarter round returns. This will eliminate the raw end of cut quarter round.
Installing Quarter Round on Round Corners
Some homes have outside corners that are rounded, while others are square. Here I describe how to cut quarter round on rounded outside corners
Return to Installing Quarter Round moldings Page From Cutting Quarter Round Moldings


